Wednesday, June 29, 2011

diy screen printing, pt. 2


I've finally tested out my screen printing set-up! (remember the tabletop I built a week or so ago here)

I knew the printing area would be fine, but was more worried about making my exposure at home. To do so, I bought a 500-watt halogen utility light for $10. After watching a lot of YouTube videos and reading contradictory information about how to do everything, I made my own executive decisions based on my prior screen printing knowledge. A few things I did in case anyone out there is thinking of setting up a similar area (and sorry, this is going to get a bit technical!):

1. While assembling my utility light, I took out the glass that normally filters the light. This does make the lamp a bit more dangerous (it gets very hot!) so I would suggest to anyone out there considering this, to stay by your light during the exposure time, just in case, and be sure your screen is a good distance away from the light (15-20") because nylon melts!

2. Because I am impatient, I guessed on my first exposure time rather than making a test area (best option: do a test area, of course). I used 12 minutes (based on internet research--not very scientific) and got a pretty good exposure minus a little unwanted texture that was either the result of a slightly short exposure time or a bad washing-out method (internet advice told me it would be good to use a scrub brush to aid with washing out when doing so in a bathtub, but I am pretty sure this is where the unwanted texture came from). Also, take note that this exposure time was with a white screen (yellow screens filter the light a bit so you need to add time) and an image on transparency. I tried a second image on the same screen, on copy paper with vegetable oil, and it wasn't nearly enough time.

3. To keep my transparency flat, I placed the glass from a picture frame on top of it during exposure time (if you are used to using an exposure unit, think upside down for making an exposure with a lamp--screen on bottom, glass on top, image placed upside down). I had a piece lying around because I had to replace the glass in that frame with plexi for an out-of-town art exhibit, but if you don't have that luxury, might I suggest getting a cheap, old, ugly frame from a thrift store that is around the size of your screen, and using that glass. To get even better results, I used some leftover foam from when I covered my tabletop (purchased near the batting area at the craft store--it's made for upholstery use and comes in 1" or 2" thick, I went with 1") and put that underneath my screen, in the "hollow" area. I laid an old black shirt on top of the foam to help absorb the light.

4. Since I don't have a power washer or even a hose I can use in the bathtub, I used emulsion remover to reclaim my screen (before, I've used bleach + a power washer). It did the trick with minimal scrubbing on my part. I used a scrub brush (from the cleaning aisle, nothing fancy) to help me out.

Since my screen had some unwanted texture, I'm going to try again this evening! I'm going to call this first run a success, however, since it was really close to perfect and I had no major issues. I hope to have new prints in the shop by Friday, made in my own dining room! Hurray, DIY screen printing!

Sunday, June 26, 2011

a few garden updates

From this morning's walk through the garden...

The eggplants are trying to bloom.

Zinnias continue to grow.

The cilantro smells so nice. I steal a few leaves here and there for salsa, but I'm hoping to harvest a big bunch soon.

One of the beds...peas, salad greens, chard, cabbage, and eggplant.

Sunflowers, growing slowly but surely. Not sure if they are getting enough sun, so we'll see if they make it all the way.

Salads have been fabulous.

Mint! Hard to believe this was merely four puny cuttings only three weeks ago.

The peas flowered yesterday! Can't wait to have some peas to snack on.

Chard is getting big!

Forest of tomato plants.

The other bed, tomatoes and peppers.

Friday, June 24, 2011

diy screen printing

I spent today getting the rest of the materials for and assembling my screen printing table top! I'm really happy with how it turned out. I also found the perfect shelf for my supplies at my favorite thrift store. I added hooks at the bottom for hanging additional items.

Drawing up a brand new design for my first screen! I'll keep you posted. I got a 500 watt halogen lamp for making the exposures. Crossing my fingers that everything works out! I did a lot of research before assembling my set-up, so I think after a few tests on exposure time, it'll be good to go.

Thursday, June 23, 2011

new etsy ventures


I'm working on a lot of new things for my Etsy shop. I am so excited about the new possibilities! Last weekend, I acquired most of the things I need to complete my dining room screen printing table. This weekend I'll actually be building the removable table top. I've got to make a padding for the bottom side, because my dining room table is actually my nicest piece of furniture!

Once finished, I'll be continuing the work I've been doing the past few months at school with screen printing (installation work), but in the process, or in between the process, I'll be making a lot of things to sell in the shop. They derive from my drawings and will include prints on paper, notecards, small and large pieces of fabric, zipper pouches, aprons, and tote bags. I'll be screen printing onto fabric and sewing the items listed, not just printing on readymade objects (I might print on some vintage objects, however). I'm excited for these new things and hopeful that they might be a success in the shop, which currently has only custom work for sale.

As a sneak peak, I have three prints up right now! But once I get my table set up, I'll be printing lots more designs, in and on various colors, nicer papers, etc., so in a week or so, you can expect a lot more.

Tuesday, June 21, 2011

welcome, summer

I started reading this book yesterday, Made from Scratch by Jean Zimmerman. It is delightful and fits right into my current research and artmaking. From the Amazon.com review: "In the past century, homemakers have become a dying breed. The domestic achievements of our mothers and grandmothers have been devalued and replaced by the easy options of fast food, hired help and prefabricated products of all kinds; meanwhile, the arts of cooking, needlework and gardening become the province of a dedicated few." The author refers to herself as a feminist and advocates the strides that the feminist movement has made for women in the workplace, but urges us not to forget the valuable handiwork of our foremothers.

Summer classes are in full swing now. I'm teaching my usual "Introduction to Photography" course (in four hour time blocks, twice a week--so long!). I'm taking a food science seminar on the topic "Controversies in Contemporary Food Culture," a beginning ballet class, and in a few weeks, a week-long art education seminar on the topic, "Creative Art Writing." I've also signed up for a metal jewelry fabrication class with my friend Alex, through the parks and recreation association! It is once a week for eight weeks. I'm excited for these new classes and straying outside of photography for the summer (though I'll still be taking photos, to be sure!).

Sunday, June 19, 2011

magic risotto


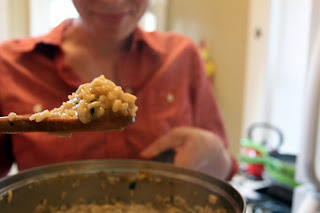
Last night's dinner, featuring a mostly local salad with olive oil and balsamic vinegar (mesclun mix from the garden!), homemade bread, and magic risotto. Okay, just risotto (vegan style--veggie broth + nutritional yeast instead of chicken stock + parmesan cheese). But I call it magic risotto in honor of the episode about Sookie's magic risotto on Gilmore Girls.

Here's hoping I have time to cook more delicious things once my summer classes begin tomorrow!

garden walk-through #2

This spring, I have been doing a weekly official walk-through of the garden and taking pictures of each plant. It seems repetitive at times, but what I love is comparing the photographs and seeing how much each thing has grown in only a week or so. The last set I posted was the walk-through from June 4. And these are from this morning:

Dill and chives. Although we aren't growing any cucumbers, they will soon be in abundance at the farmers' market, and I plan to can some dill pickles!

I have to show the gaps in my gardening skills as well as the successes, because I wouldn't want anyone reading to think that everything comes out perfect every time. This is my red raspberry plant, which I bought from a yard sale last month. I planted it hastily in a less than ideal soil mixture because I was out of the mix we used in the raised beds. The soil that the cutting had come from was very clay-like, so I thought it would be okay, but we've gotten a lot of rain and even with a layer of rocks at the bottom of my planter, it was holding a lot of water, hence the leaves that turned yellow. I made some more Mel's Mix, the recommended planting mixture for square foot gardening, and repotted it yesterday. I think it will be able to recover, and I hope it doesn't hold as much water after this, since Mel's Mix is light and drains well.

Oregano! I actually got this oregano plant for a photo shoot last October, and kept it inside all winter. It's going crazy out in the sun.

The basil is doing well. I used some in a batch of risotto I made for dinner last night. Mmm!

The chocolate mint is loving its terrarium, which it's almost outgrown (but I'll just start cutting it back--not a big deal for mint!). I put the lid over it on colder days (we've had some highs only in the low 70s recently!), and take it off when it's sunny out.

My back step. Love the yellow. It's so cheery!

Thumbelina zinnias. I can't wait for them to flower.

The cilantro is growing slowly but surely.

The tomatoes are in need of pruning. I've been doing some additional research on growing tomatoes in square foot gardens, and if they are staked, they need to be pruned quite a bit. Caging works as well and does not have to be pruned but each plant takes at least 4 square feet with cages, whereas with stakes they can be planted 1 per square foot. We'll have to see how this turns out, but for this year at least, the stakes are in the ground and the pruning will have to suffice. Here's hoping the tomato crop is large!

White cherry tomatoes are emerging. I can't wait!


Barbecue grill next to the second bed, which holds eggplant, peas, chard, and salad greens.

Hey, peppers!

Purple beauty eggplant is about to flower! Gretel eggplant is close behind it.

Something is enjoying the arugula, but the rest of the mesclun mix is untouched.

The peas have raced to the top of their trellis, and I suspect they'll start flowering any time now.

Swiss chard is looking amazing!

I may have gotten a little ahead of myself when I bought some cabbage seedlings on a whim and confused them with lettuce and spinach, which can be planted in large quantities of 4-9 plants per square foot, depending on the variety. Of course, cabbage is very different than spinach and lettuce, and I should have realized it was going to be a problem. I'm now looking for somewhere to transplant half of these cabbages to! Oops. But, at least they are doing well at the moment.

Impatiently waiting on the spinach to dry out so I can save the seeds! I love learning new gardening skills/processes.

Friday, June 17, 2011

made from scratch

Meet Baby. This is my neighbors' cat. And yes, these are my back steps. And yes, I have a fence. I normally encounter Baby on my front porch, give her a few pats on the head, and go on my way. She is a sweet cat. However, she has recently found a way into my backyard and thinks that if the door is open (which it is, if I'm cooking and it's below 80 outside--my kitchen gets stuffy!) she is welcome to come in. She also thinks my garden is her personal litter box. Sigh. I spent awhile training her to stay on the third step down in hopes that she wouldn't keep coming in the apartment. She is very smart and would humor me for five minutes or so, not moving from the step when I'd tell her to stay, but as soon as I'd turn my back, she'd run in. Not cool, Baby.

Yesterday, I was invited to a special dinner, and volunteered to make a vegetarian dish. I had purposely made espinacas con garbanzos for the first time the day before to test it out. My first batch had storebought bread in it, but I didn't have enough for the second, and rather than run to the store, I decided it would just be easier as well as more delicious to throw a loaf of bread on in the bread machine. I didn't have time for a wheat loaf (takes around 4 hours) so I went with white (only 2 hours) and although I don't normally prefer white bread, it turned out amazing.

After I got the bread going, the next step was to harvest some spinach from the garden. My spinach is starting to bolt, but doesn't taste bitter yet. The process is being delayed by some of the cooler weather we've had over the past week. I'm hoping that when the harvesting period is over, I can save the seeds to grow in my fall garden.

Next, I cooked the spinach in olive oil with a pinch of salt.

After the bread was done, I cut two 1/2" slices into cubes and "fried" it, or toasted in a skillet with more olive oil. I also added cumin, paprika, pepper flakes, ground pepper, vinegar, and fresh garlic as the recipe calls for, then ground it up in the blender.

The final step is to add the ground bread crumbs and spices to the chickpeas (cooked 2 days earlier in my crock pot for convenience) and an 8 oz. can of tomato sauce. At the last minute, stir in the cooked spinach. The dish is wonderful on its own, but even better when served with a slice of bread toasted in the skillet with, you guessed it, more olive oil.

I also took a batch of vegan brownies. I love this brownie recipe because it's vegan, but there are no gimmicks in it, just sugar, flour, oil, baking powder, salt, cocoa, and flax. I sometimes cook with vegan butter, but try not to make it an everyday thing, since it is a processed food. If I can bake something without it, I'm all for that. Same with anything else that is made from soy. I believe many of those things have their place, but I try to be careful with my consumption levels. I would definitely be up for using local, family farmed dairy products, if I weren't lactose intolerant.

I don't have any finished pictures, but trust me when I say they are delicious! Someone at the dinner asked me if I had made the brownies without eggs, so I suppose it's noticeable, but he went on to say that he still thought they were great.